One of the best sights this time of year is the
Christmas light
displays. All the colors and design seem to bring life to the still of the night. Photographing these displays is a wonderful way to share the sights with others. I have a few tips that might make it a touch easier to capture the moment in a wonderful image that you can share for years to come.
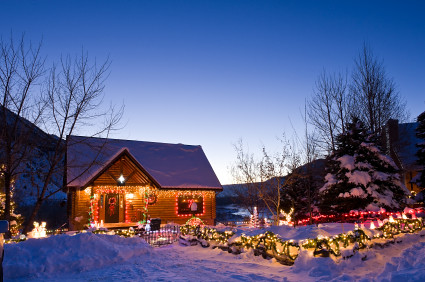 |
| Photo by Scott Cramer |
1. Plan or schedule you shooting time. The time of day is very critical to a well exposed photo full of colors. The best time is when the sky and the lights are as equal as possible, in other words the light from lights does not overpower the sky. My preferred time is shortly after the sun goes down, perhaps 15 minutes or so. I will usually take some test shots at two to three minute intervals starting at about 15 minutes after the sun goes down. When you have found the best time you will only have about ten minutes of shooting time, be ready!
On the other hand, some folks like the pitch black background so you see virtually nothing but lights with some structure peaking through the lights. If this is what you are after then I would wait until dark sets in and then take the shot at a faster shutter speed.
2. Use a supporting device. A tripod or beanbags, in case you are shooting from a car window, is very helpful. Actually, they are a must have in most cases because your exposure time will be slow. If you are after the black background look, I still recommend a bracing device.
3. Christmas lights are for the most part tungsten; be sure to set your white balance to tungsten before shooting. This will ensure the colors you see are what you will get.
4. Snow makes an interesting foreground, so don’t try to crop it out when framing your picture. Reflective items make for interesting foregrounds as well. If you are using the roof of the car as a base, try to get some of the reflections in the image.
5. Turn off all flash accessories. Flash is not a good thing for Christmas light photos.
After you have taken a few photos, use the remainder of your sight seeing to discover new and wonderful sights for the next shot. Christmas lights can be a little tricky but, with a little practice you will be creating wonderful images for years to come.